Test Step
Test steps are the heart and soul of a test case. They describe a sequence of actions which ATS performs during the execution of a test case.
When you create a new test case, it will be empty by default. You will have to add test steps to it. For more information on how to add a test step to a test case, see Test Case.
To see the details of a test step, click on the name of the test step. The details will open below the test step.
Description
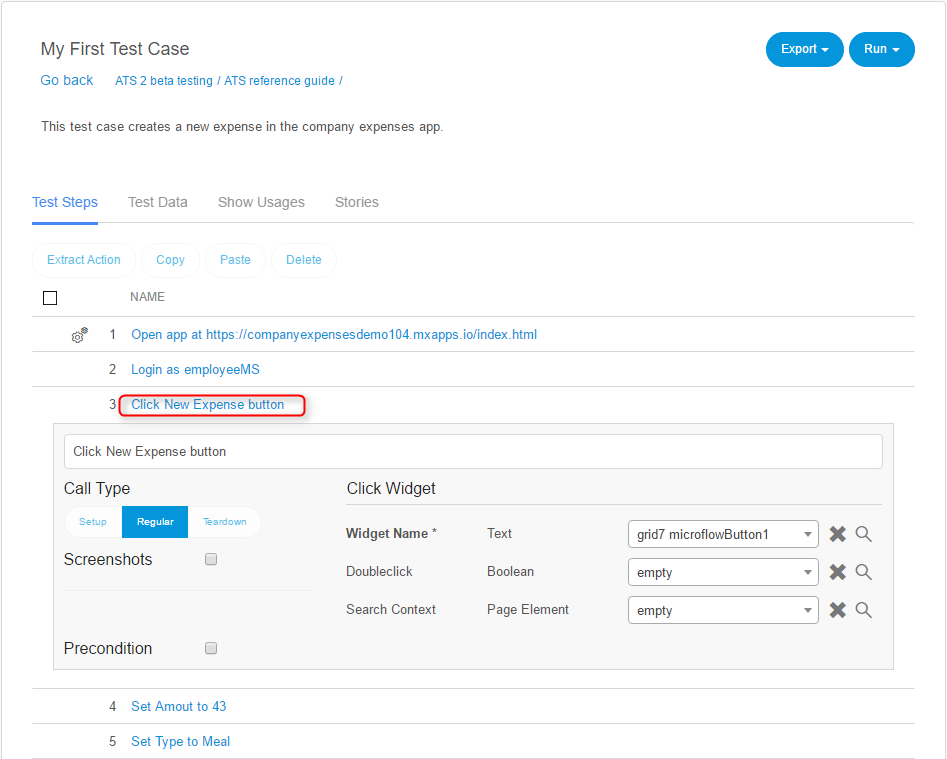
Every test step has a description box, where you can give your test step a clear description.
By default, the name of the test step is the name of the action used in it. But if you set a description, it will replace the test step name. With this, you can describe your test scenario step by step in a human readable way, without having to write an extra description.
If you record your test steps, ATS will enter a description automatically. For more information about recording test steps, see Recorder
Call Types
Call types define the order of the test step and how they affect the final result.
In ATS there are three different call types:
Setup
ATS moves the test steps with the Setup call type to the start of the test case automatically. ATS uses the Setup steps to get to the actual test scenario.
For example: Open application > Login as user
Only set a test step to setup, if it is not part of your actual test scenario.
If a setup test step fails, the test will stop and the result is set to "not executed".
Regular
Regular test steps are the flesh and bone of your test case. They cover the main functionality of the test scenario. If a regular test step fails, the test will stop immediately and the result is set to "failed".
Teardown
Teardown test steps are automatically moved to the end of a test. They should be used to undo the changes your test case made in the application. Failing teardown test steps do not affect the result of a test case.
Screenshot
By checking the screenshot checkbox, ATS will take a screenshot of the corresponding test step during the run. Note that screenshots will only be taken, if screenshots are enabled in the Run Configuration.
Action Parameter
Action parameters are the input parameters of the selected test step action. ATS marks required input parameter with an asterisk and writes them in bold.
You can set the value for the parameter by typing the name of a variable or constant in the parameter input box.
ATS will provide you with suggestions for the parameter value.
For primitive parameter types like Text or Number, you can set the input value by typing the desired value in the input box.
Another way of setting the parameter value is to use the Edit Input Value dialog. To open the dialog, press  . This dialog will show you all available input values for the parameter.
Precondition
When you check the precondition box, you can select an action that will count as a precondition for that test step. According to the result of the precondition action, ATS will skip or execute the test step. In other words, if the precondition action fails, ATS will not execute the test step. If the precondition action passes, ATS will execute the test step.
The result of a precondition action won't affect the end result of a test case. It is only used to determine if ATS should execute a test step.